More snow on the ground this morning. I’ve been coaxing seeds to open up and spread their green-ness in order to make me happy and increase the oxygen in my place. This post has been sitting for about 10 days while I watched everything grow. Some great success, some mild success.
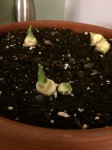
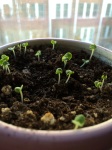
Three weeks ago I planted a pot of chia seeds because that’s all I had here in my kitchen. I normally just toss them into smoothies and such, sometimes make a pudding out of them, etc. A sprinkling of seed, some water, and in a few days, TINY GREEN CHIA SPROUTS! Too much soil for eating, though.  When seeds germinate by having a soak in water, they release sugars and proteins to help nourish the wee baby plant in its first few days, changing the flavor and making the seed and new sprout itself very healthy. (By the way, this is also the first step in making beer. Germinated grains are dried, milled, and added to water. The newly freed sugars feed the yeast that’s then added to ferment. This was my old life. Message me if you want to talk alcohol production!) Because they grow in just a few days and don’t require planting OR light, they’re great for winter snacking. I don’t know why I didn’t think to do it earlier.
Looking online I found several sprouting trays for purchase and decided on a cute $18 one from Amazon that is 6″ in diameter. Hm…. I looked into making my own and found directions for trays and jars. Both would take just a few minutes to assemble. I had everything I needed for three small stacking trays using cleaned take out containers, so I went that way.
I drilled lots of drainage holes in the two shorter containers and one of the larger ones and carefully cleaned off all of the plastic “shards” from the drilling. The undrilled containers act as drip trays. Then I took one of the lids and cut out most of the inside so I had only the rim left over. I attached the lid to an large undrilled container, and the large drilled container fit right in. Then the smaller drilled container inside that, then a full lid, so I had two “levels” there. The second small drilled container fit into the last large undrilled container, then a lid.
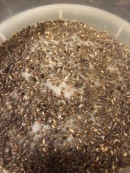
I folded some paper towels and cut them into circles to fit inside the containers over the drainage holes. Two dampened circles per tray, unless you’re using really thick paper. Seeds need to soak for a few hours (or overnight) before hanging out to sprout. Rinse them, then add to them to the sprouter. Chia seeds, you may know, get somewhat gelatinous. After they soaked for a bit and were good and gooey, I spooned a decent amount into each of the three trays, added a bit of water to the top and gently pressed on the lid. (I wound up not using them to allow for better air flow, just let them sit on top w/o snapping it on.) The excess water dripped down to the bottom trays, so there was no worry about over watering.
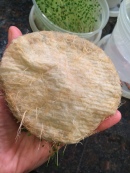
Well, it worked, and it didn’t. They sprouted, but before they did that, they stunk. I mean, rotting fish stunk. There was plenty of airflow, and I even removed the tops altogether. I’m happy to say the smell went away after they were fully sprouted. There seems to be a sweet spot in the growth where the sprouts were tastiest. Once they had a set of big green leaves (and by big I mean about 1/4″ each) they got bitter. What was pretty cool though was that the roots bonded with the paper towel, making something of a chia mat.
This was the first part of my sprouting experiment. I also used quart sized canning jars to sprout mung beans, adzuki beans, and buckwheat groats. More of that in the next post.


