Archive | April, 2013

Some chilly nights slow down planting

23 Apr

It’s been really cold here…like, really cold! We’ve had a few nights dip into the mid 30s over the last week or so. Also, there’s pollen everywhere. Lots of it. All over. Coating everything like a thick, giant yellow-green snot inducing powdery blanket. And I’ve had a cold for four days. Whoo hoo!

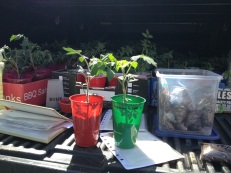
I went to the Purcellville farmer’s market last weekend before work and picked up these Image 26two little guys from Dave the tomato guy. (Hi!) I told him to follow me here. I got a chocolate cherry tomato plant and a cabernet grape. He said the chocolate cherries have a deep red purple color and an almost salty sweet flavor. I had never heard of them before, so of course I had to try them out. The cabernet grapes look like they’ll be a nice classic red grape. I had originally planned to plant them right away, but I’ve been keeping them on my windowsill for the last few days and they appear to be happy. I’d like to keep them until this weekend when it’ll be over 50 at night. They’re just babies!

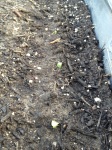
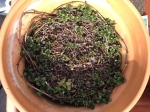
My seeds have been slow to germinate, but they’re finally starting to grow. I know these guys are tiny, but they’re there. I took these photos yesterday, 4/22.

Today I saw three string beans starting to break the surface. No carrots just yet either, but it may be for a few reasons.

  • Seed tape and glue have to dissolve before the seed can germinate.
  • It’s been pretty chilly.
  • The seeds are a season or two old.

I’ve used old seeds before. (The packet usually says “Packed for 2013” or whatever year.) They are always fine, but sometimes take an extra few days to pop up.

Before this cold last week, we had a nice heavy rain. I used it as an opportunity to fill up my water buckets. I have yet to build a large scale self-filling rain barrel. I needed a new flexible bucket to use under the gutters and came up with used pre-washed salad containers. They’re great. I have one under each gutter and the buckets right next to them. Takes only a few minutes to fill them up, and then I fill the watering can for an extra 2.5 gallons. Again, I get sopping wet outside, but at least I’m not out there forever.

Other than that, everyone seems to be settling in nicely. I even had a bird watch me take these pictures as he bathed in a puddle on the roof.

Big planting on a frost-free weekend

15 Apr

Seeds and plants and replants…BLAMO!

I put my seed tape to work this weekend. Using Farmer Russell’s earlier guides, I made little furrows to plant the seed tape, probably about 3/4″ deep. I kind of mixed the tapes up a bit, so I will have a few of each kind of carrot scattered all over. Covered those puppies up, and voila! Also planted basil in the middle “V” shapes in the carrots. Purple string beans in the other tank.

IMG_7385IMG_7384


On Sunday my friend and I went to a garden center to get some plants. To protect her anonymity, I will call her “ShmErin” here. (Her actual name may or may not sound similar…I’ve always wondered if articles that say names have been changed actually do use real names, and say that just to throw you off.)

IMG_7388

We each purchased a $20 for $40 Groupon deal from  Garden World of Virginia and  found some nice stuff. Also the staff was very helpful. Remember…SUPPORT YOUR LOCAL ECONOMY! I was fascinated by the water fountain things, but so were a pair of adorable twin two year old boys.

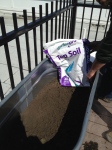
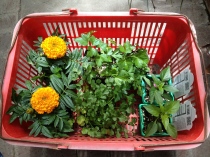
Aside from several bags of organic potting soil, I picked up a packet of cucumber seeds and live plants.

  • Oregano (to replace my dead plant)
  • Parsley (to replace the other dead plant)
  • Cilantro (for my rabbit, not me. I think cilantro tastes like soap. Ew.)
  • Red bell pepper
  • Jalepeno pepper
  • Two orange marigold plants that I don’t know what to do with yet.

IMG_7391

We went home and got to work!

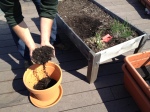
First, I put the peppers in one of the old tomato boxes with the parsley and cilantro. Easy. Looks good. Then, I took a chunk of chives for ShmErin’s growing herb garden. I originally planted these chives from seed in 2011, so I was very happy that they were still alive and doing well and that I could share them. Then I moved the chives and onions to the second former tomato box so they are alone. Farmer Russell just posted a few words about companion planting on his Tumblr…gotta be careful with alliums. Some plants don’t mind being near them, others will die. I decided to just keep them in a separate container. I’ll probably plant a few more rows of green onions this week, too.  The ones in there now were also planted in 2011 and have come back each year. Also, he cautioned not to plant the marigolds near the beans. The will act as a natural herbicide and then…no more beans. They’re great near tomatoes, though! I will probably put them near the tomatoes. Next, several of my potted herbs needed a bit of a, shall we say…pick me up? I removed the thyme and chocolate mint from their containers, loosened up the roots, which were absolutely packed, added some new potting soil to the bottom of the pots, replaced the plants and filled in around them with more soil.

Finally, a row of cucumber in the back of the second tank. They will be trained up some bamboo sticks I have, and then eventually they can hang over the fencing. At least that’s the plan now.

Then, ShmErin watered! A lot. We carried up a ton of water. Either a ton or about 40 pounds in total. Then we celebrated with cocktails on the roof. Then I came up later in the evening and watered everyone one more time. Then it rained early this morning. That was awesome.

I felt like Mother Nature had approved of my planting. Win.

OCD gardener plants seeds!

10 Apr

Time for planting!

Organized planing!

All in a row!

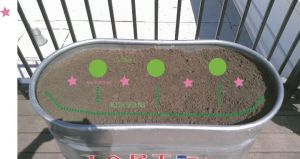
Here are Farmer Russell’s plans for each of my tanks. They have a decorative element to the design, too.

First tank is tomato, carrot, basil.

first tank design

Second tank is cucubrits beans, nasturtium.

second tank design

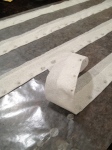
For the carrots, I made seed tape. Last year I just dropped seeds into a little trough I made with my finger. It worked well, but I had to thin them on a regular basis. Tape is great for little tiny seeds that are hard to see once they go into the soil, and they’re spaced well enough that you have to thin much less and therefore waste fewer seeds. I had used seed tape in the past, but I hadn’t thought of using it for the roof. Seed tape is also expensive, and you’re limited to the varieties available. Russell suggested I make my own tape. I used this as a quick how-to. The whole thing was very simple.

You’ll need:

  • Seeds
  • Toilet paper
  • Wax paper
  • School glue, or just thin regular white glue with some water.

Take an 18″ piece of toilet paper, fold it in half, then in half again so it’s about 4.5″ long, then in thirds lengthwise. Open the paper and separate the layers making 6 strips.

Lay out a piece of wax paper. Put drops of glue about 1″ apart on the paper, then drop one or two seeds on each drop (I did only one.)

Carefully fold the paper over on the seeds and gently press, encasing the seeds.

Let the strips dry and then carefully peel off of the wax paper. You can roll them up and store them in a baggie or container.

To use, just make a little trench at the depth specified on the seed packet and lay the strip in it. Cover and water. The glue and toilet paper will dissolve.

New year, new garden. Just add water!

8 Apr

Welcome to 2013! This will be a bit of a long post, but it’s somewhat instructional.

I began construction on the new, improved roof garden yesterday. With the help of Richmond, VA based Farmer Russell, a sustainable agriculture consultant and recently reformed farmer (who is new to Tumblr,) I have made some significant upgrades to my growing spaces. A bit about the expert brain I’m going to be picking this season (so you know my info below is legit, finally.) My friend Farmer Russell has been sustainably growing gourmet produce for the more the a dozen years. He has run CSAs in the Richmond area and has spent the last two years providing James Beard nominated chefs with the the finest in farm to table produce. He is now sharing his years of hard won wisdom with everyone from backyard gardeners (like me!) to farmers looking to grow more sustainably on thousand acre spreads and organizations looking to learn more about how local food and conscientious consumption can impact their community throughout the mid Atlantic.

He also makes some really good home brew and talks about it on Twitter.  Mmmm…beer.

Anywhoo, here is the finished garden after we cleaned up. So far, so good!IMG_7279

If you’ve read my previous posts, you know that my two biggest issues were space and water. My plants really weren’t in containers that were deep enough for their root systems to properly expand. It caused the plants stress and basically stunted their proper growth. Also, water. >sigh< These new containers should really take care of both problems. We calculated these weigh approximately 160 lbs each, so that’s like a person size, but spread out over a much larger area. With the right amount of water, each should weigh about 220-240 lbs, which, again, is spread out over a large area. (1 gallon of water = appx 8 lbs.)

I started off with two 2’x2’x4′ 100 gallon galvanized stock tanks from Southern States. They are about $90 a piece, which is actually cheap when you consider that the two buckets I’ve had my tomatoes in for the last two years were around $60 each.  Also from Southern States I picked up a big thing of ProMix growing medium for about $37. Everything had to picked up at the store. Total was about $227

Then, a visit to Home Depot…IMG_7238

  • Two bags of lava rocks at $3.87 each
  • Six bags of top soil (this wasn’t the brand, but the price is the same, $1.37)
  • Two bags of humus & manure for $2.97 each.
  • Two tomato stakes because I had two already but really thought four would be better, considering how big the plants got last year.
  • 12″ terracotta pot and saucer to temporarily replant my chives. The most expensive part of this trip, at around $8
  • Bunch of bricks I’m not going to use. I thought I would elevate the tanks, but that would have just created some pressure points in the tank and on the deck. Farmer Russell told me not to get them, in his defense. I still thought it was a good idea. I was not correct. But, now I have some bricks.

Home Depot total with tax: $48.84.

Total, before plants: $325, including VA sales tax. Yours may vary slightly, especially if you don’t get those stupid bricks. Argh.

Then we got to work!

We removed the metal plug from the drainage hole in the tank. Really, that’s a great feature. I’ve seen a few posts where people drill additional drainage holes into the bottom and sides of the tanks, but all you’re doing is damaging the coating which can lead to rust and leaching of whatever might be in the metal. Keep the coating in tact! Farmer Russell says just remove the plug and follow the steps below to properly layer and you’ll have no problem.

In order, then some pictures.

  • Lava rocks piled on top of the drain hole. For drainage and improved water flow on the bottom of the tank.
  • Styrofoam. Also for drainage and reduces weight. We went about 1/3 up the tank with this styrofoam, which I just happened to have saved in big sheets from some furniture I bought a few years ago. (HA! AND YOU CALLED ME A HOARDER! WHO’S LAUGHING NOW?) You can also buy a big bag of peanuts from an office supply or shipping supply store, but why not reuse what comes in the mail and packaging materials?
  • Remainder of potting mixture from the old buckets. Reusing what I can!

We also found some grubs in one of the tomato pots. They made their way down there some time over the winter. I insisted that we toss them. Then I threw up a bit in my mouth.

Next, add the following layers, making sure each one is free of clumps and even.

  • Layer top soil
  • Layer promix
  • Layer top soil
  • Layer humus/manure

Then…

  • Layer of promix
  • Layer of oyster shell – don’t need a lot and it will slowly add calcium and other good stuff over time.
  • Layer of top soil

Don’t mix the layers now. The mixture will settle and compact on its own, and the plants will be able to break it up.

Finally, Farmer Russell sketched out where plants should go. Tomatoes, carrots and basil in one tank, possibly beans, radishes, cucumber, melon in another. He is creating a more detailed layout for me now. I will post that when it is ready. We did plant a row of radishes while we were up there. They’ll be ready in a few weeks.

Winston and his lazy cousin are keeping watch, as usual.

Herbs will remain in separate pots, and the onions and chives will probably get broken up and replanted into one of the former tomato buckets with new planting mix. I’m going to do some research and see what companion plants will work well with them in the bucket.

Whew!

Water…It’s what plants crave! (And you thought it was Brawndo.)

3 Apr

So, I have no direct access to water on the roof.

Now you’re thinking:

  • Attach a hose to your outdoor spigot? (Can’t! Don’t have one!)
  • Uh, attach a hose to your faucet and send it up through your window? (Highly impractical. I’d probably need about 150′ of garden hose…and it would go across my living room…and I’d have to leave my window open.)
  • Get a rain barrel and hook it up to the gutter? (Can’t! Condo building…not allowed.)

As I mentioned a few posts ago, I’d been carrying water up to the roof from my kitchen a few hours after filling a 2 gallon watering pail. While it might make for some good weight lifting, it’s exhausting and not very efficient. Plus, those plants are THIRSTY up there with no shade in the heat of the summer. That means several trips back and forth. That was all of 2011.

There had to be a better way! In 2012 I started to collect water from the bottoms of the 3 gutters I could reach during a rain and dump it into a 5 gallon pail. A few problems with this method:

  • The bottom of the gutters are about 6″ from the deck, so I need a small containers to collect the water. (See below…I also used a quart sized yogurt container.)
  • Small containers don’t hold a lot of water = many trips to the big 5 gallon bucket. I had a flexible bucket that helped a bit, but I could only fill it about 1/4 of the way every time, maybe a gallon at the most. In the photo, it’s the pink one with the handles. It wound up cracking in the fall, probably because it’s not supposed to be abused as I had.
  • When the 5 gallon pail is full, it weighs about 40 lbs…that’s a lot for me, and it’s hard to carry a bucket of sloshing water.
  • I got sopping wet every time. (Umbrellas are not practical devices while harvesting water I learned after about 12 seconds.)
  • No photo of the 5 gallon bucket, for some reason, but I swear it’s there!IMG_4121

What was nice about filling up all of these container was I usually didn’t have to water for two days or so after collection because the garden drank up from the sky and the tomato buckets reservoirs were pretty full. But then we’d have several days of no rain….sometimes over a week and the bucket water would be used up in one fell swoop.

I also tried to make a bottle drip irrigation type of thing. It . You can find directions all over on the interwebs.

It worked, but not very well. I started with full bottles and well watered soil. The water was gone in a few hours, I’m guessing because it’s hot up there. (Have I mentioned that?) I did try it in late July, so who knows. I think this would work better for house plants. 😦

This year, however, I’m going to create some kind of rain sculpture thing for collection…not really sure how it’s going to look, but my other option is more buckets.

Or Brawndo.