Tag Archives: indoor garden

Grow Some Tasty Grass For Your Bunny

26 Mar

Want to make your buns super happy? Grow some fresh grass at home in under a week!

Equipment:

– Wheatgrass. (Buy in bulk for best price, usually under $2/pound. Look for hard winter wheat or wheat berries.)
– Clean containers of the same size that will stack into one another, plus one extra. (I like round plastic takeout style containers because they’re easy to clean and move around.)
– Potting mix. (Nothing special. Just a handful or two per container.)
– Heavy plastic. (Thickness of a ziplock bag, think. Anything will work, recycle if you can!)
– Water & love

1) Soak about 1/2 cup of wheatgrass overnight. This will wind up making about 2-3 containers worth, depending on the size of your container. I started with (L-R) buckwheat, wheatgrass, and barley. (We’ll ignore the barley and buckwheat for now. I don’t think the buckwheat sprouted properly, but the stuff I used was VERY old.)

2) The next day, prepare your containers. I added about 3/4″ of potting mix to the clean containers, and then pressed it down using the other container. This part is important! You want to create a good base for your roots. (Wheatgrass doesn’t actually need a growing medium, but it takes way longer without.)

3) Sprinkle your soaked seeds over the prepared potting mix so you don’t see any mix, but try to get just a single layer. Water each container so the mix is saturated.

4) Cut a piece of plastic wide enough to cover your container, with an additional 1″-2″ all the way around. Place a piece of plastic on top of each layer of seeds, and put another container on top. Don’t stack more than three containers. The final layer should be an empty container with a gentle weight, like a jar.

4) No need to water, and no peeking! (Well, maybe just this once.) The seeds will germinate very quickly in the dark. Left photos are the day after planting, right is two days after planting, and time to move to the next step.
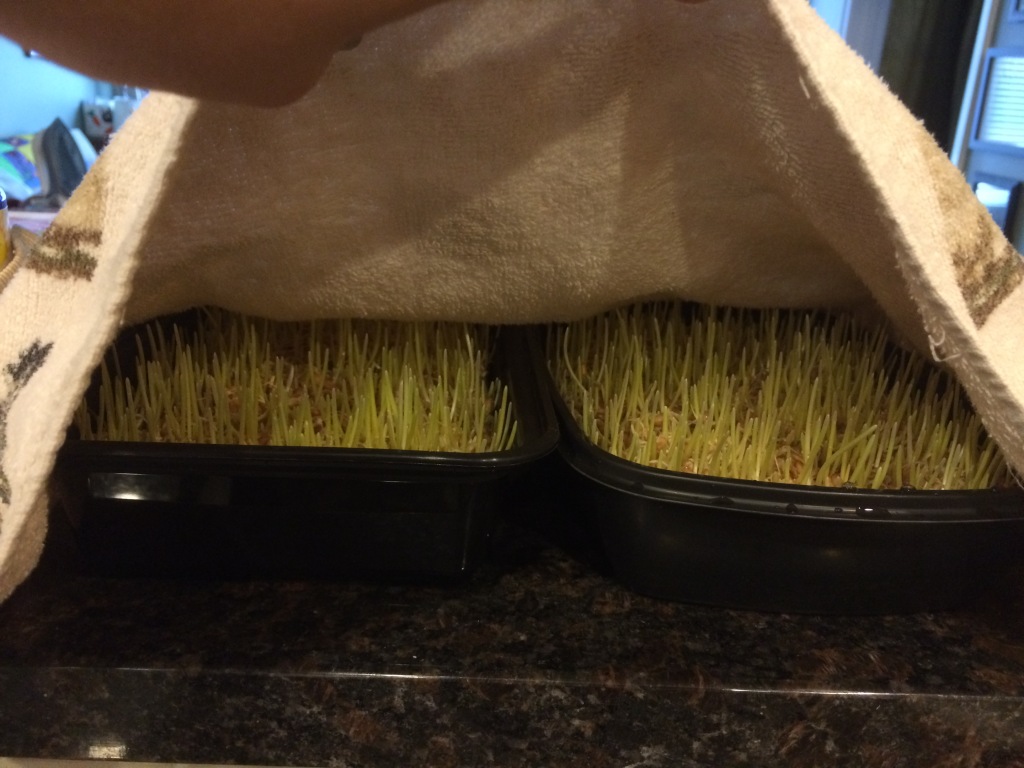
5) Unstack and put the containers in a box that you can easily close. I always throw a towel on top to keep the top and sides of the box closed. You want to block out as much light as possible. Leave the plastic lightly on top of the containers. Remove the plastic after the second day to avoid mold.

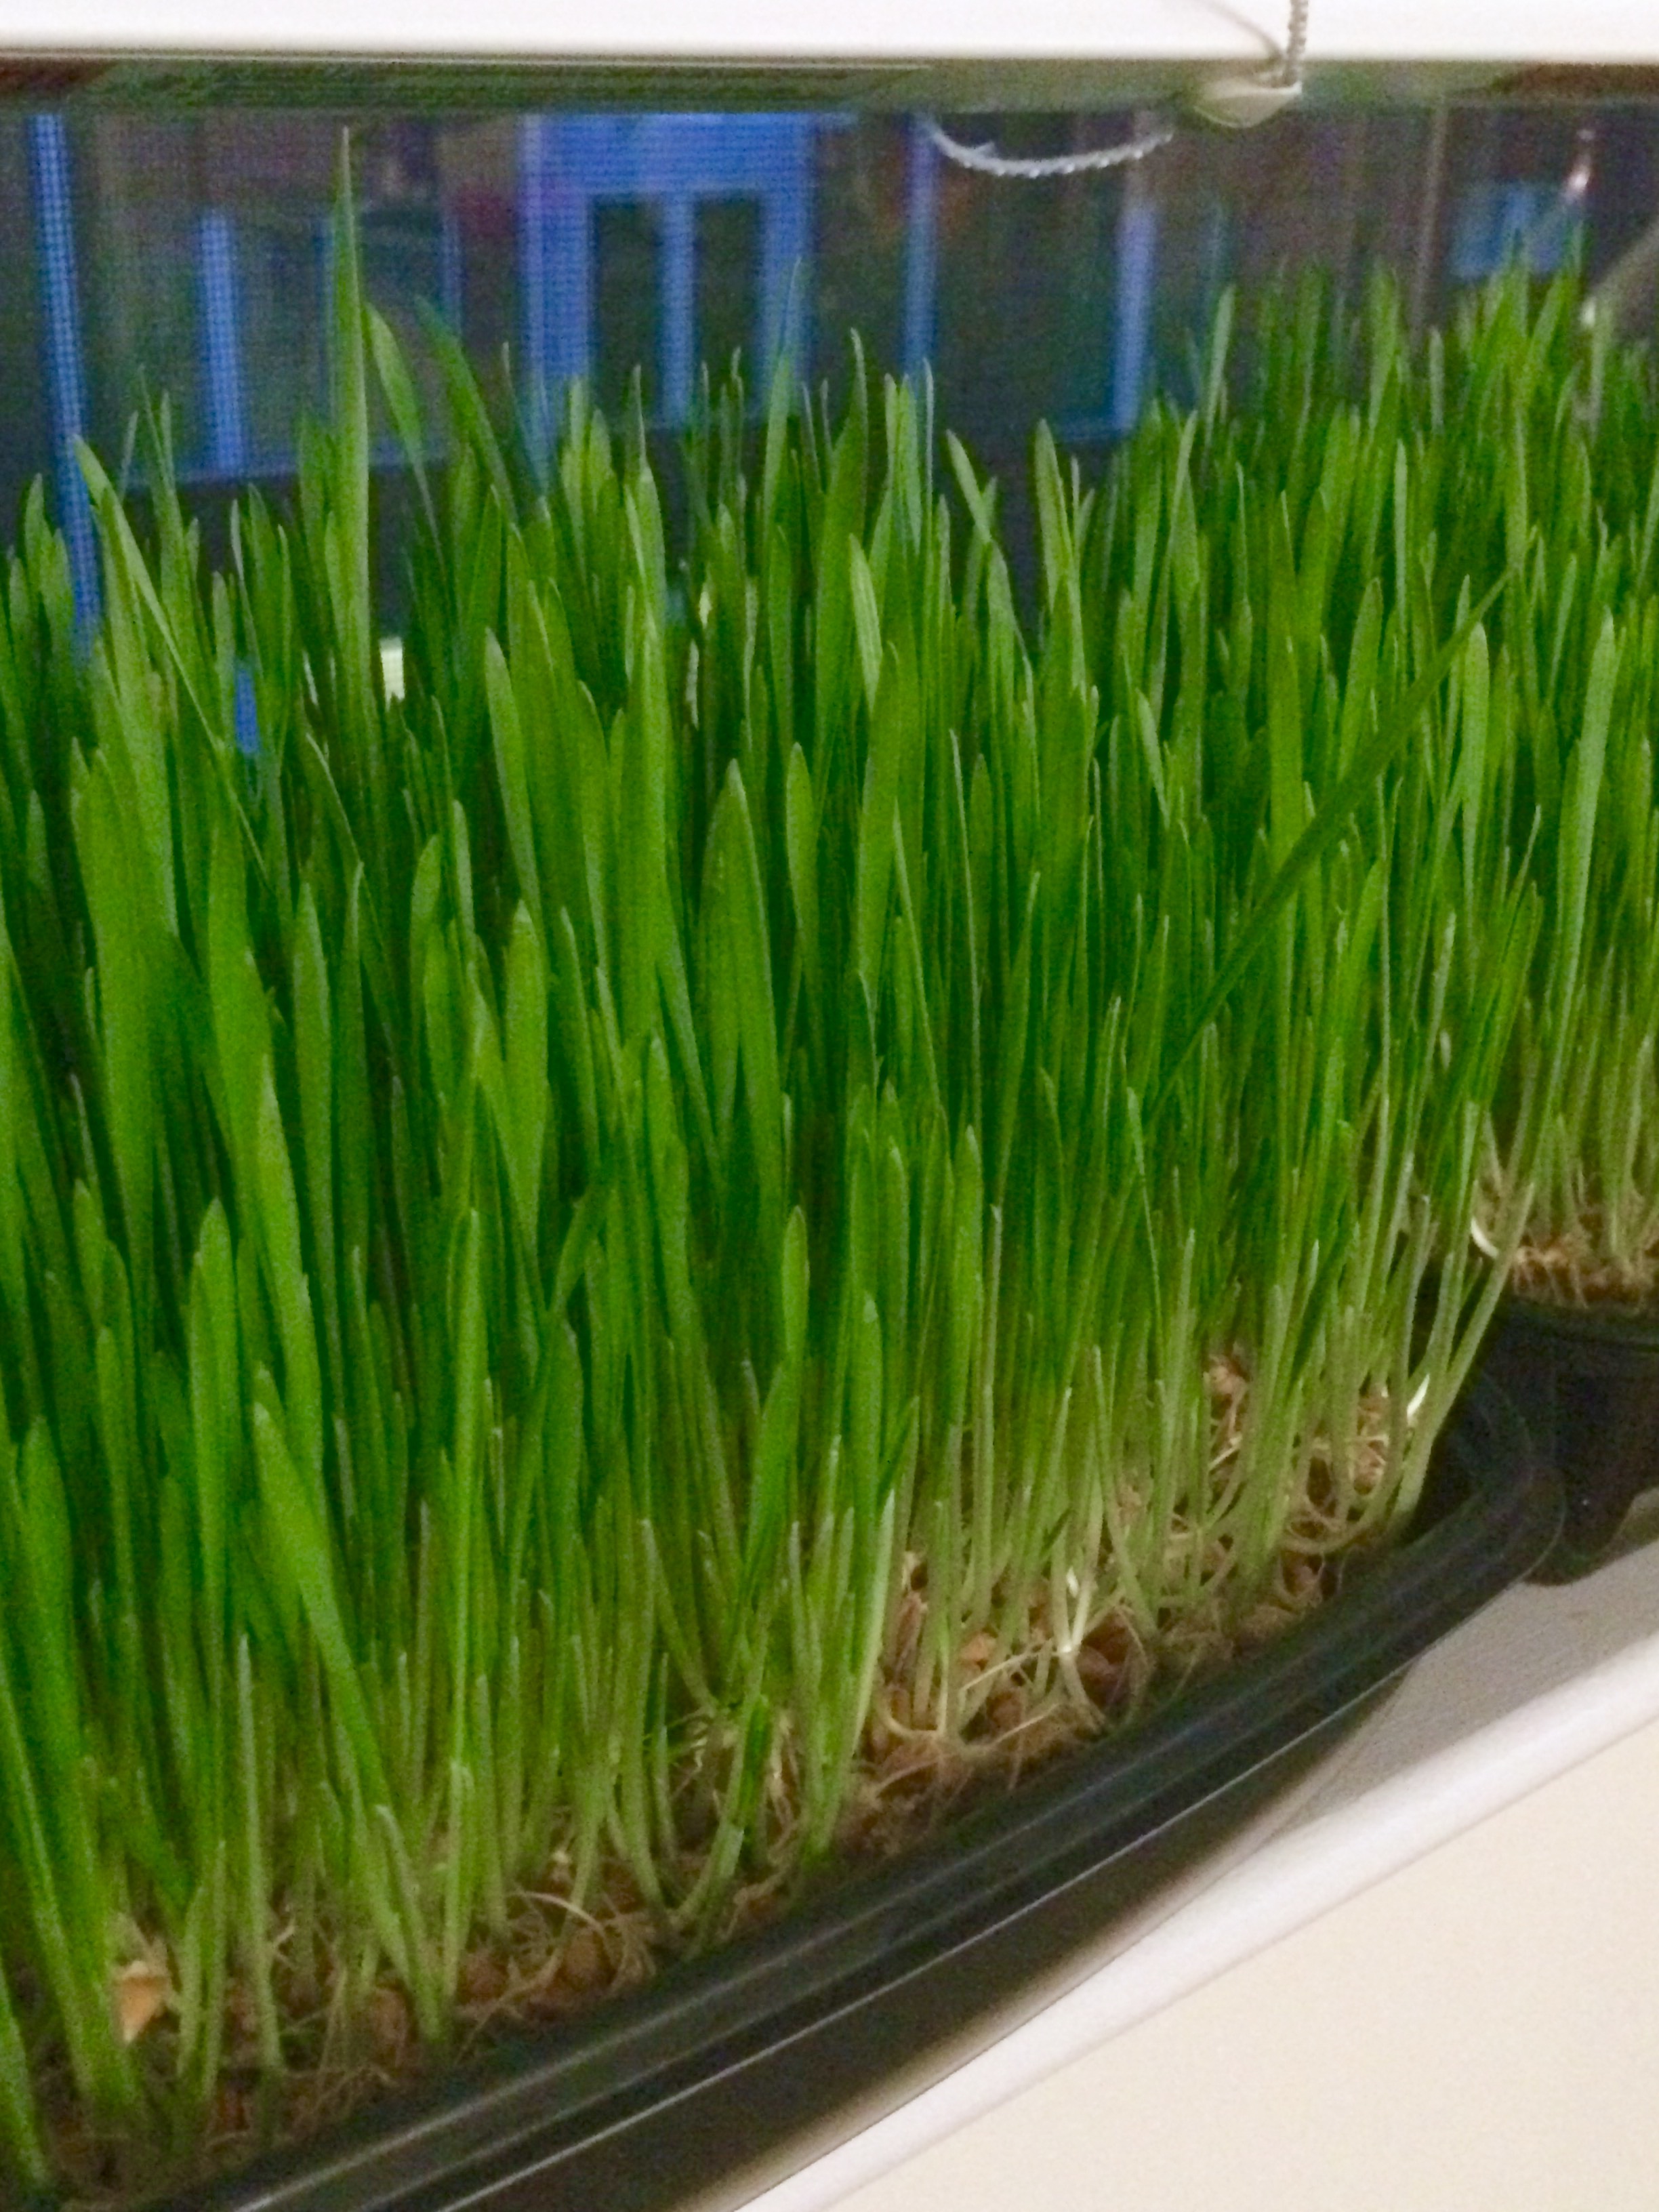
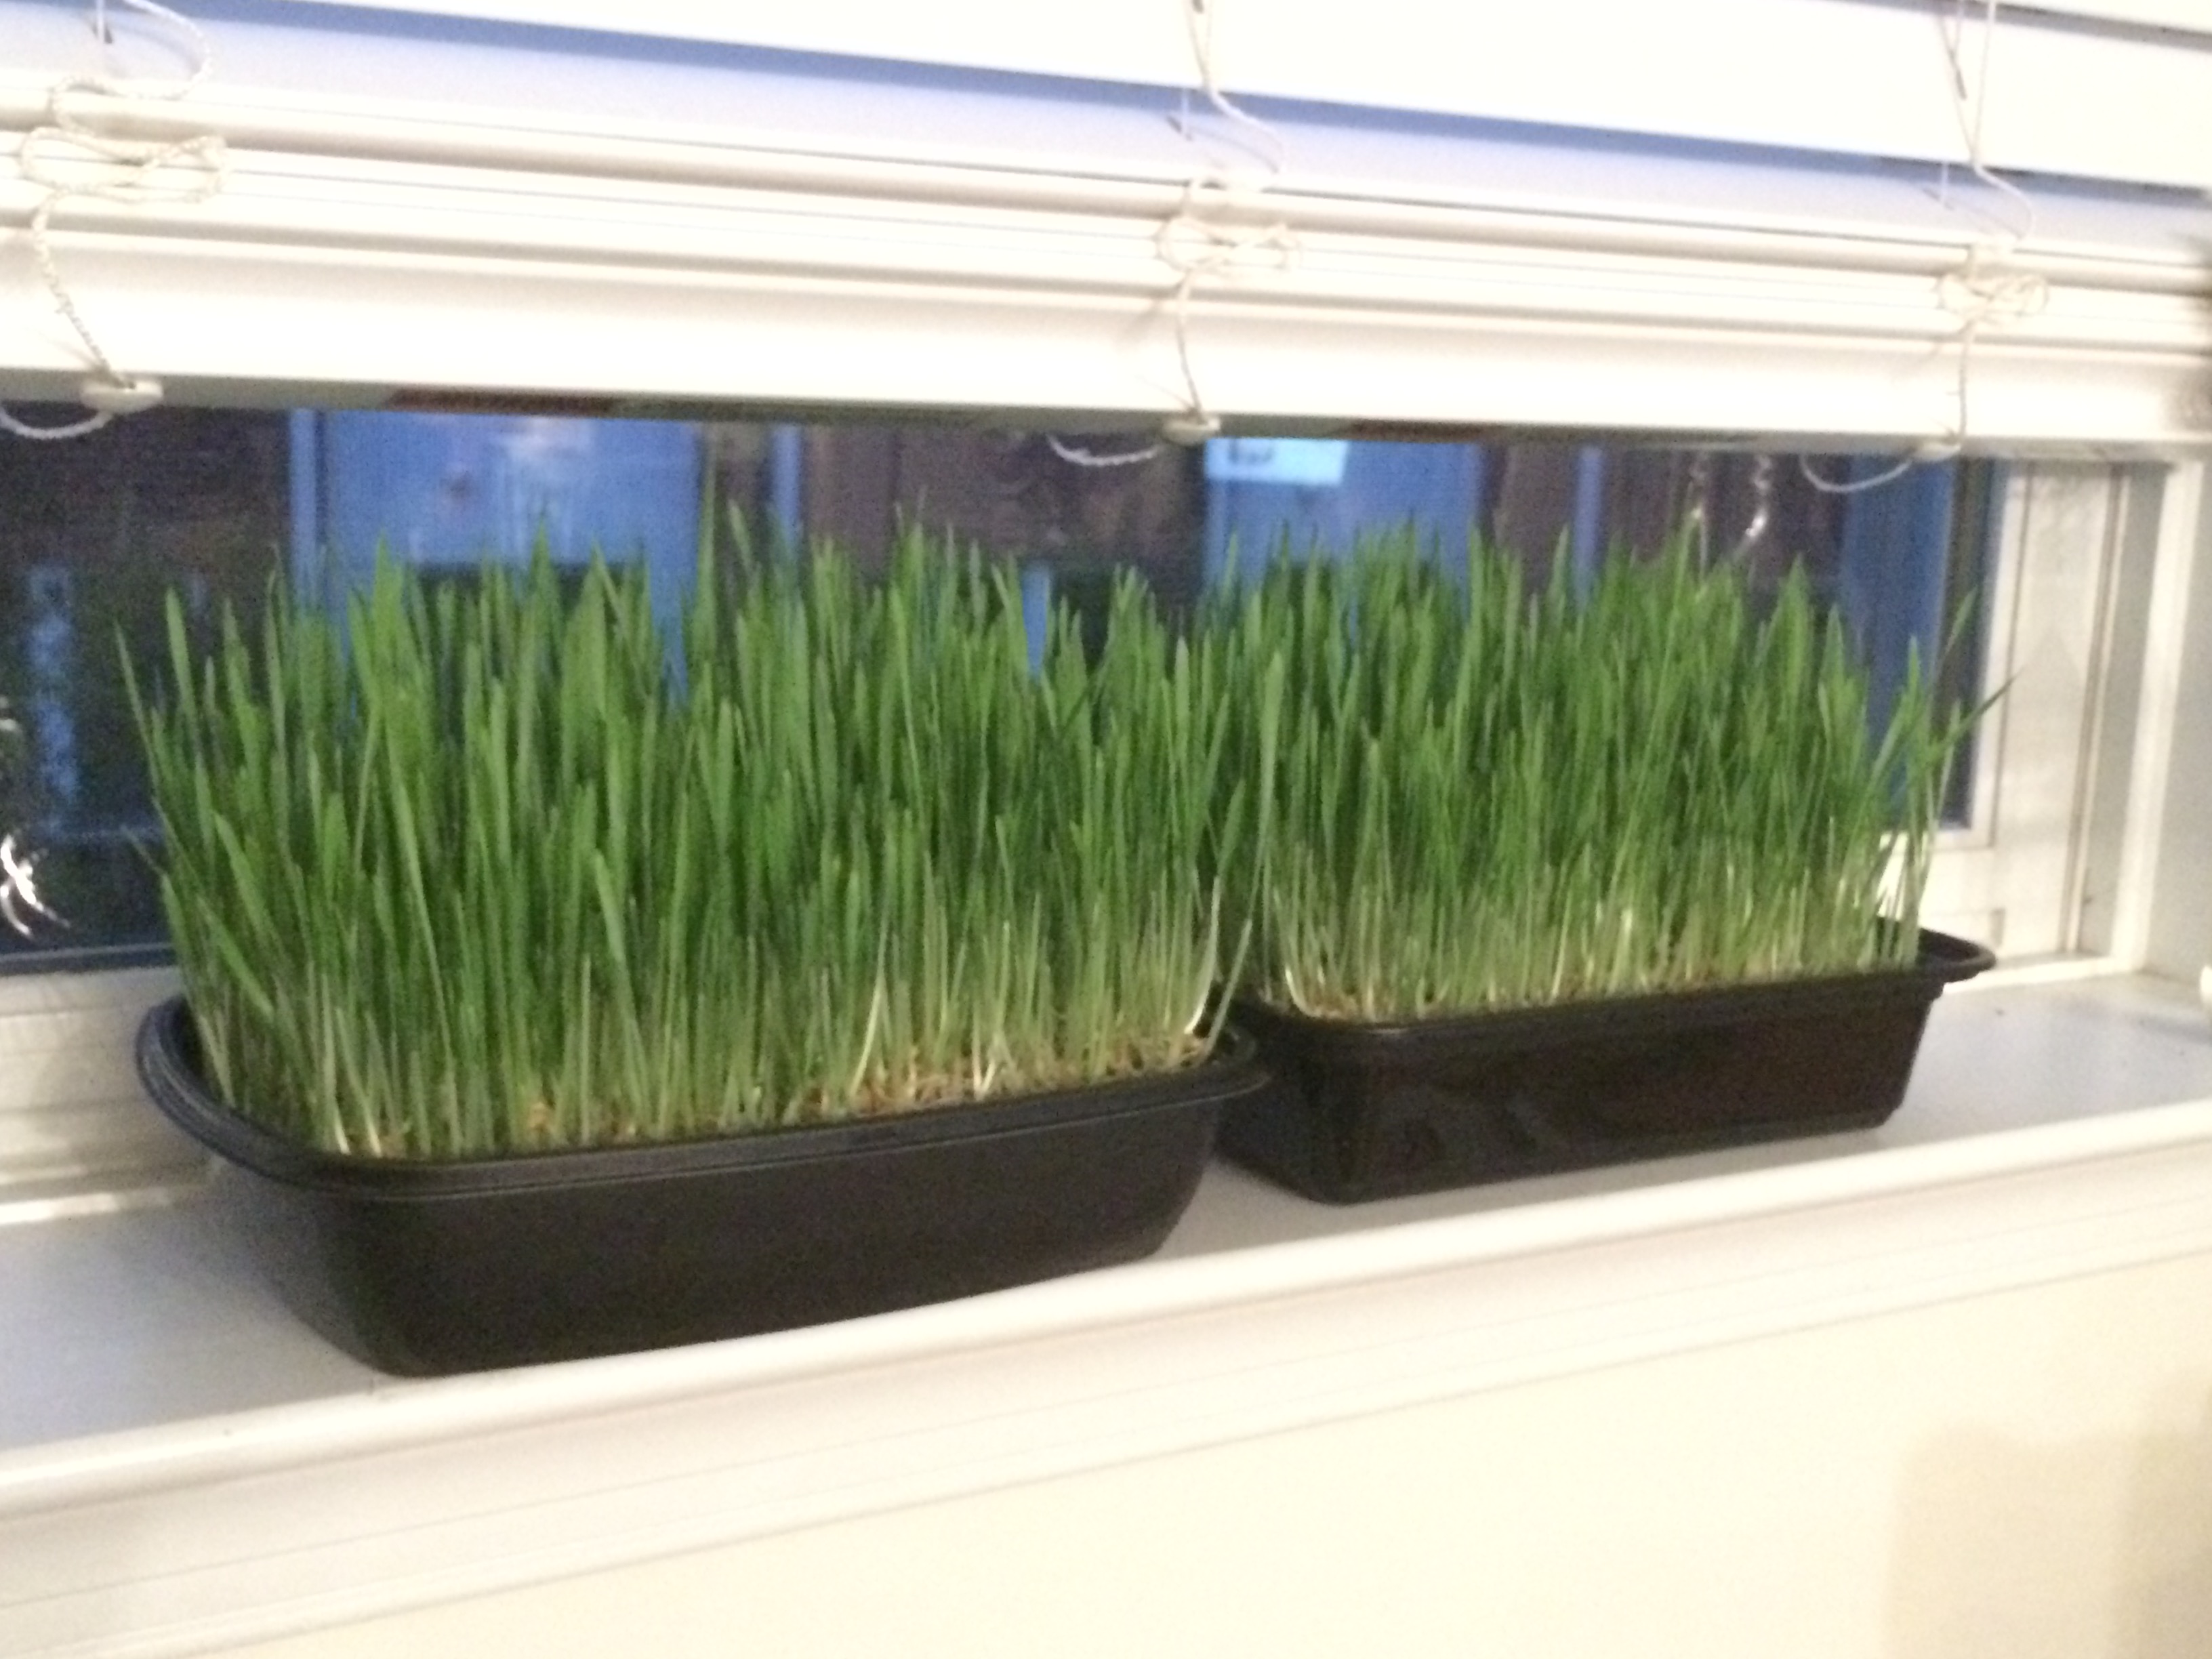
6) In about two days, you’ll have yellow grass about 3″-4″ tall. Take it out, put it in the sun (or even just indoor light), and it will continue to turn green and grow. Water just a bit every day from now on.

7) Once the grass has reached 5″-6″ in another day, you’re ready to serve! Total time: 6-7 days.

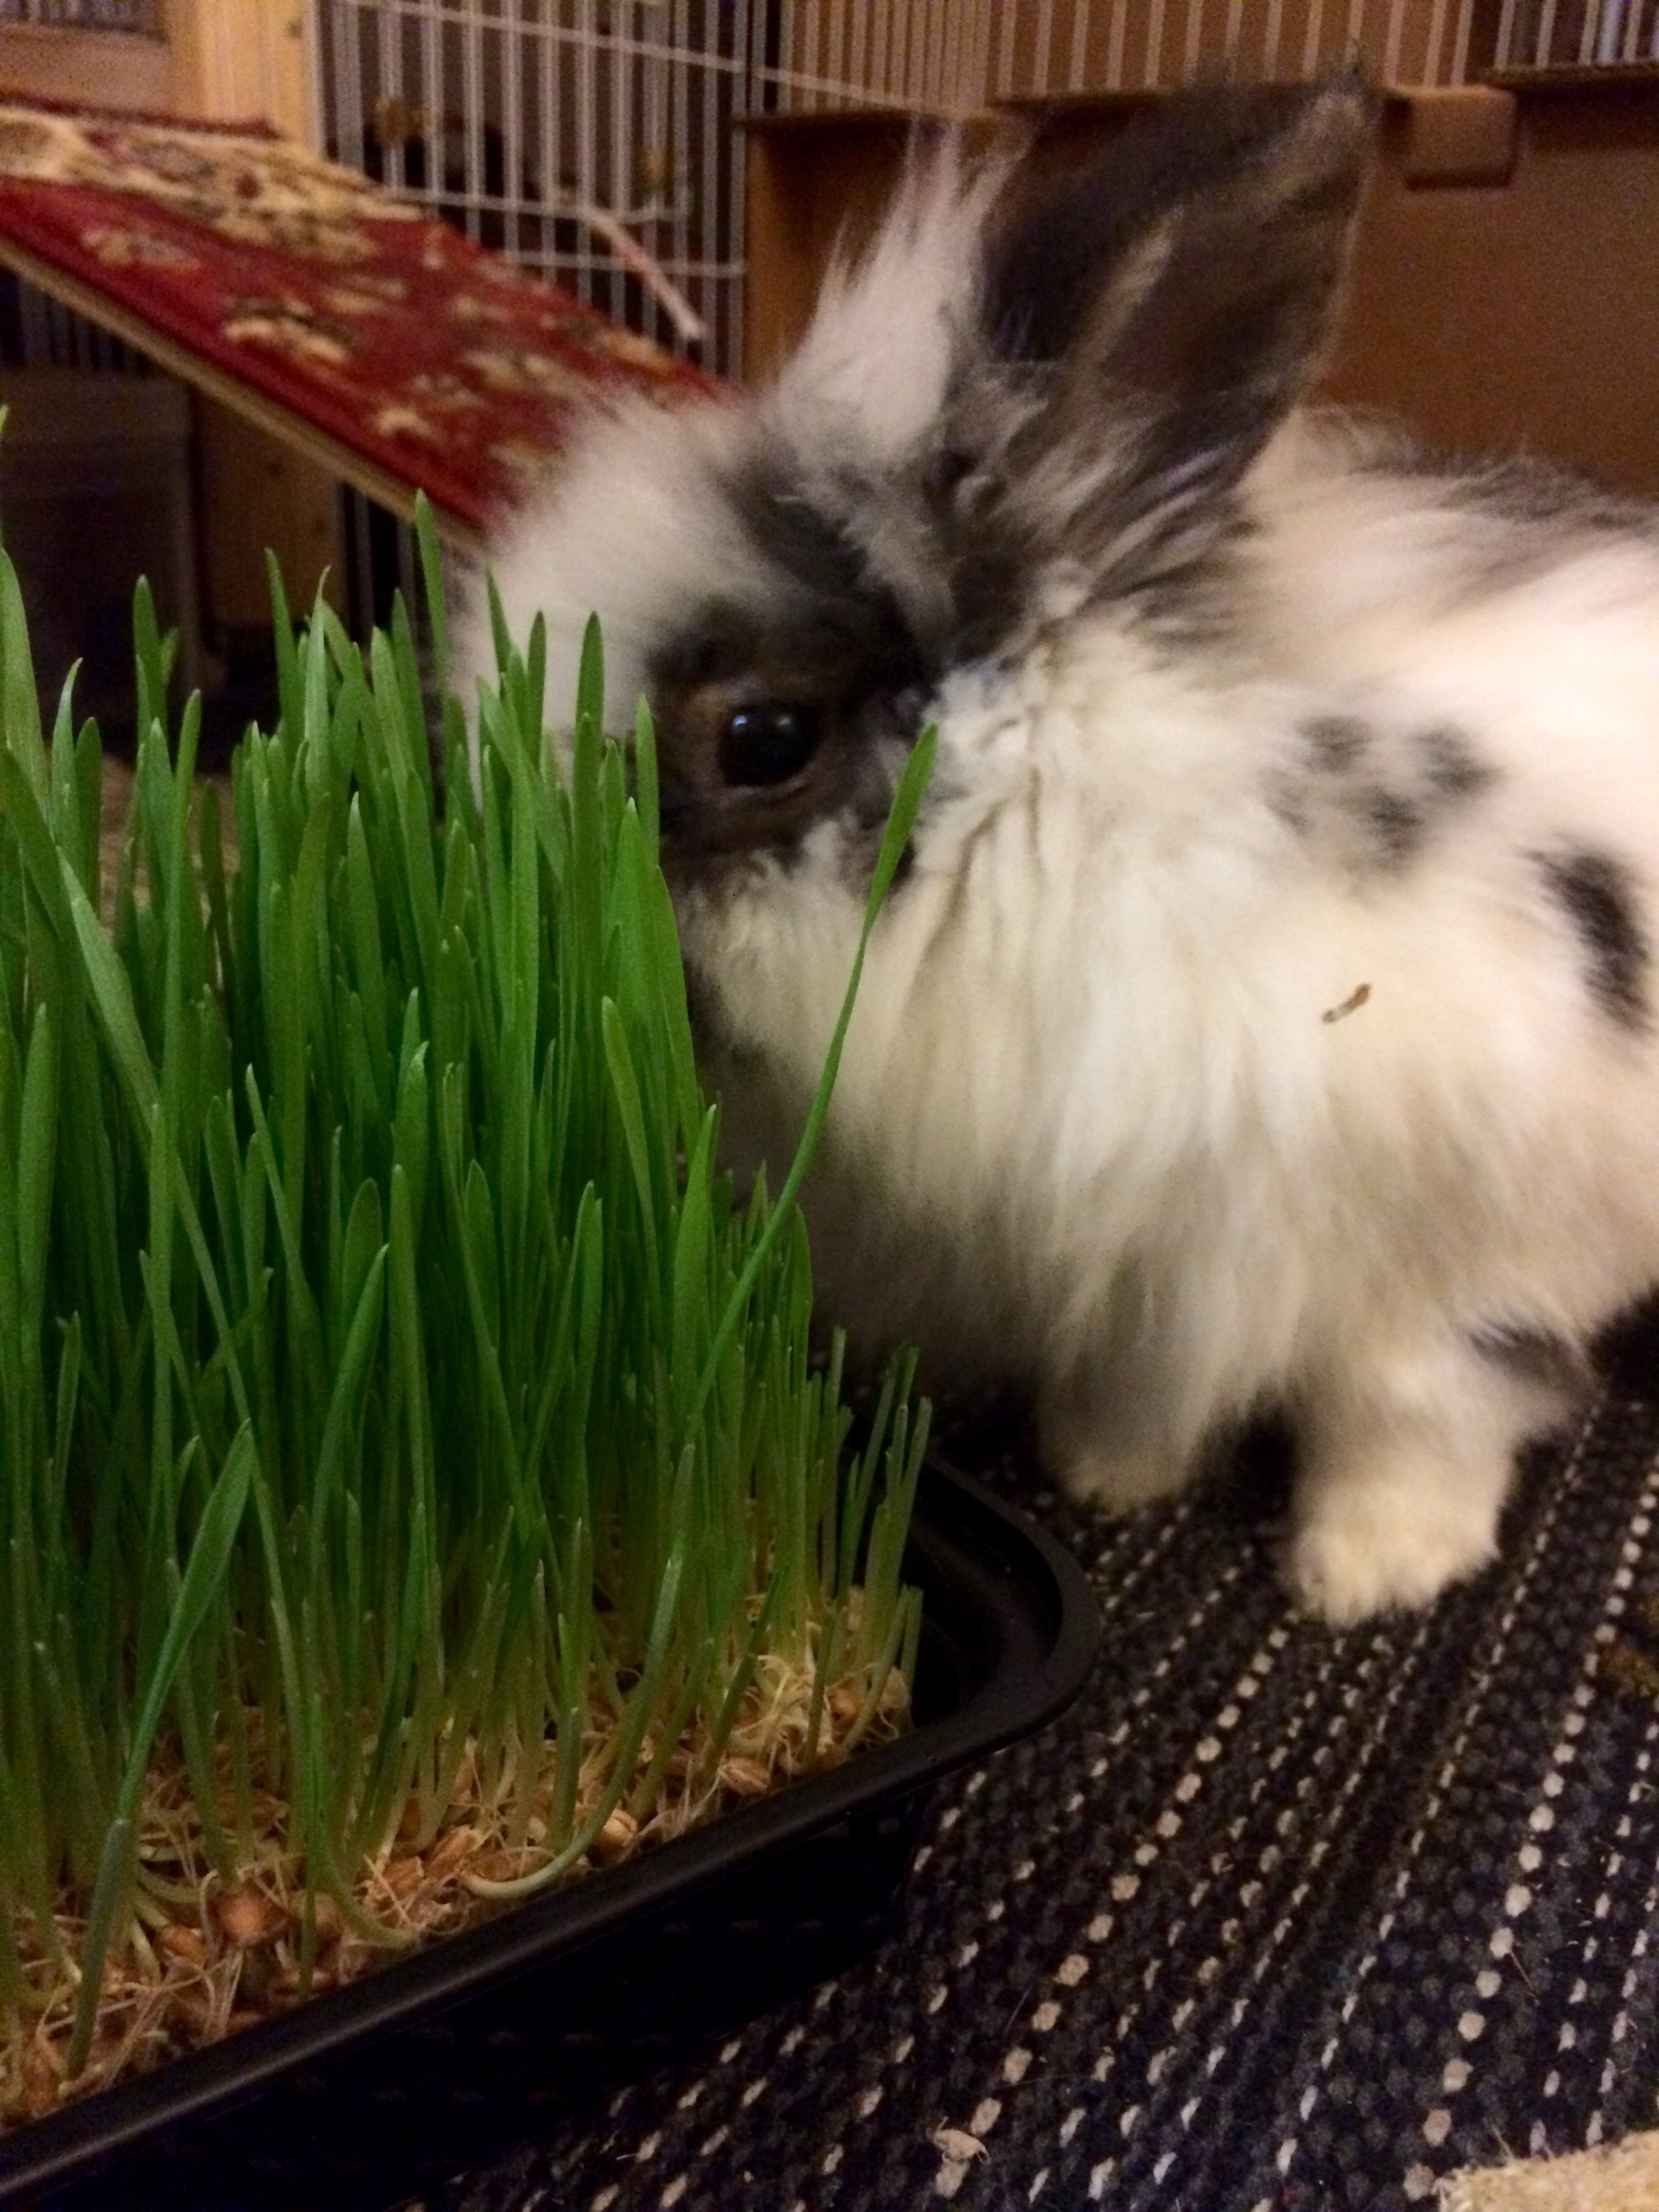
8) You can let him or her nibble on their own, or trim it and serve. Buns will eat down to the white part, where it will naturally regrow. You can get two good grow cycles, maaaaaybe three. Growth does slow down after the second trim, so I usually just toss the whole thing into the compost and start over. If you want to trim it yourself, cut at that same point.

Indoor update!

11 Mar

Since losing my garden last year, I’ve focused a lot more on indoor plants. This winter, however, I wanted to start some miniature tomato and pepper plants. I bought some grow lights and made this little set up. They were inexpensive and super easy to set up. I’ll probably move them around in a bit. They are connected to a timer, so I don’t have to remember to turn them on an off every day. 


The plants seem to LOVE the lights. I have to work on transplanting them all to larger containers. I’ll take care of that this weekend. The yellow fly tape is TERRIFIC. The fungus gnats are annoying, but they’re not interested in anything besides the plants.

I started everything from seed in late Jan. (I always mark dates on the tags when I start.) Here I have micro tom tomatoes from Baker Creek, several kinds of purple and green basil, parsley, hot jigsaw peppers, and hot Peruvian aji peppers, and some dwarf sweet alyssum. The wheatgrass in the corner is for my bunny, Miss Elliott Hopsalot. I have a lot of that lining the windowsill, too.

Some of the basil will be donated to the Central Library’s Plot Against Hunger garden to go into the tanks in a few weeks. 

Adventures in Wheatgrass

16 Jan

A few years ago I experimented with photo-nov-09-5-59-37-pmsprouts. Here is my chia seed sprouting experiment. I also eventually tried mung beans, adzuki beans, and something else I can’t remember. I wanted to try again with wheatgrass this past fall, mostly for snacks for my bunny friends. It’s supposed to be super healthy, but sprouted wheatgrass makes a nice, fresh treat for buns and cats.

I started with hard red wheat berries. Got them from the bulk bin at MOM’s, but I think most grocery stores have at least packaged wheat berry seeds. In bulk it was around $2.49 a pound. I got about 1/2 pound to start with. In a glass jar, cover seeds with water overnight. I used the ring of the canning jar lid and a piece of polyester batting so air can flow and water can easily come out. Drain the seeds, and lay the jar on its side. Rinse the seeds daily for a day or two. This is about 1/2 cup of dry seeds.

photo-jan-16-9-47-04-pm

When they begin to sprout, spread them on a 1/4″ layer of potting soil in a shallow container, basically in a single layer, but it doesn’t have to be exact. (Next time I’m going to try hemp fiber or burlap fabric, just enough for the roots to take hold.) I used the bottom of two take out containers. Then slide the containers into a paper bag or cover with a towel until the grass reaches about 2 1/2″ to 3″ or so, maybe two or three days. You don’t want them to get any light. Keep the soil barely wet the whole time.

photo-nov-06-12-21-44-pm
When you hit about 3″, put your grass on a sunny window, and it will turn green and grow another inch or two within a few days. Harvest by cutting where the white turns green, and you’ll be able to cut a second time in about four or five days.

photo-nov-09-5-18-35-pm
To use, offer to your favorite bunny or cat friend. Dogs might like it too? I don’t know.photo-nov-10-5-09-58-pm 
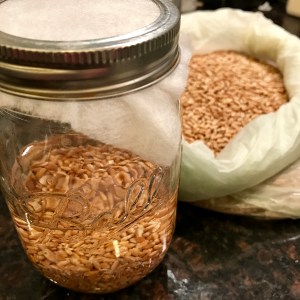
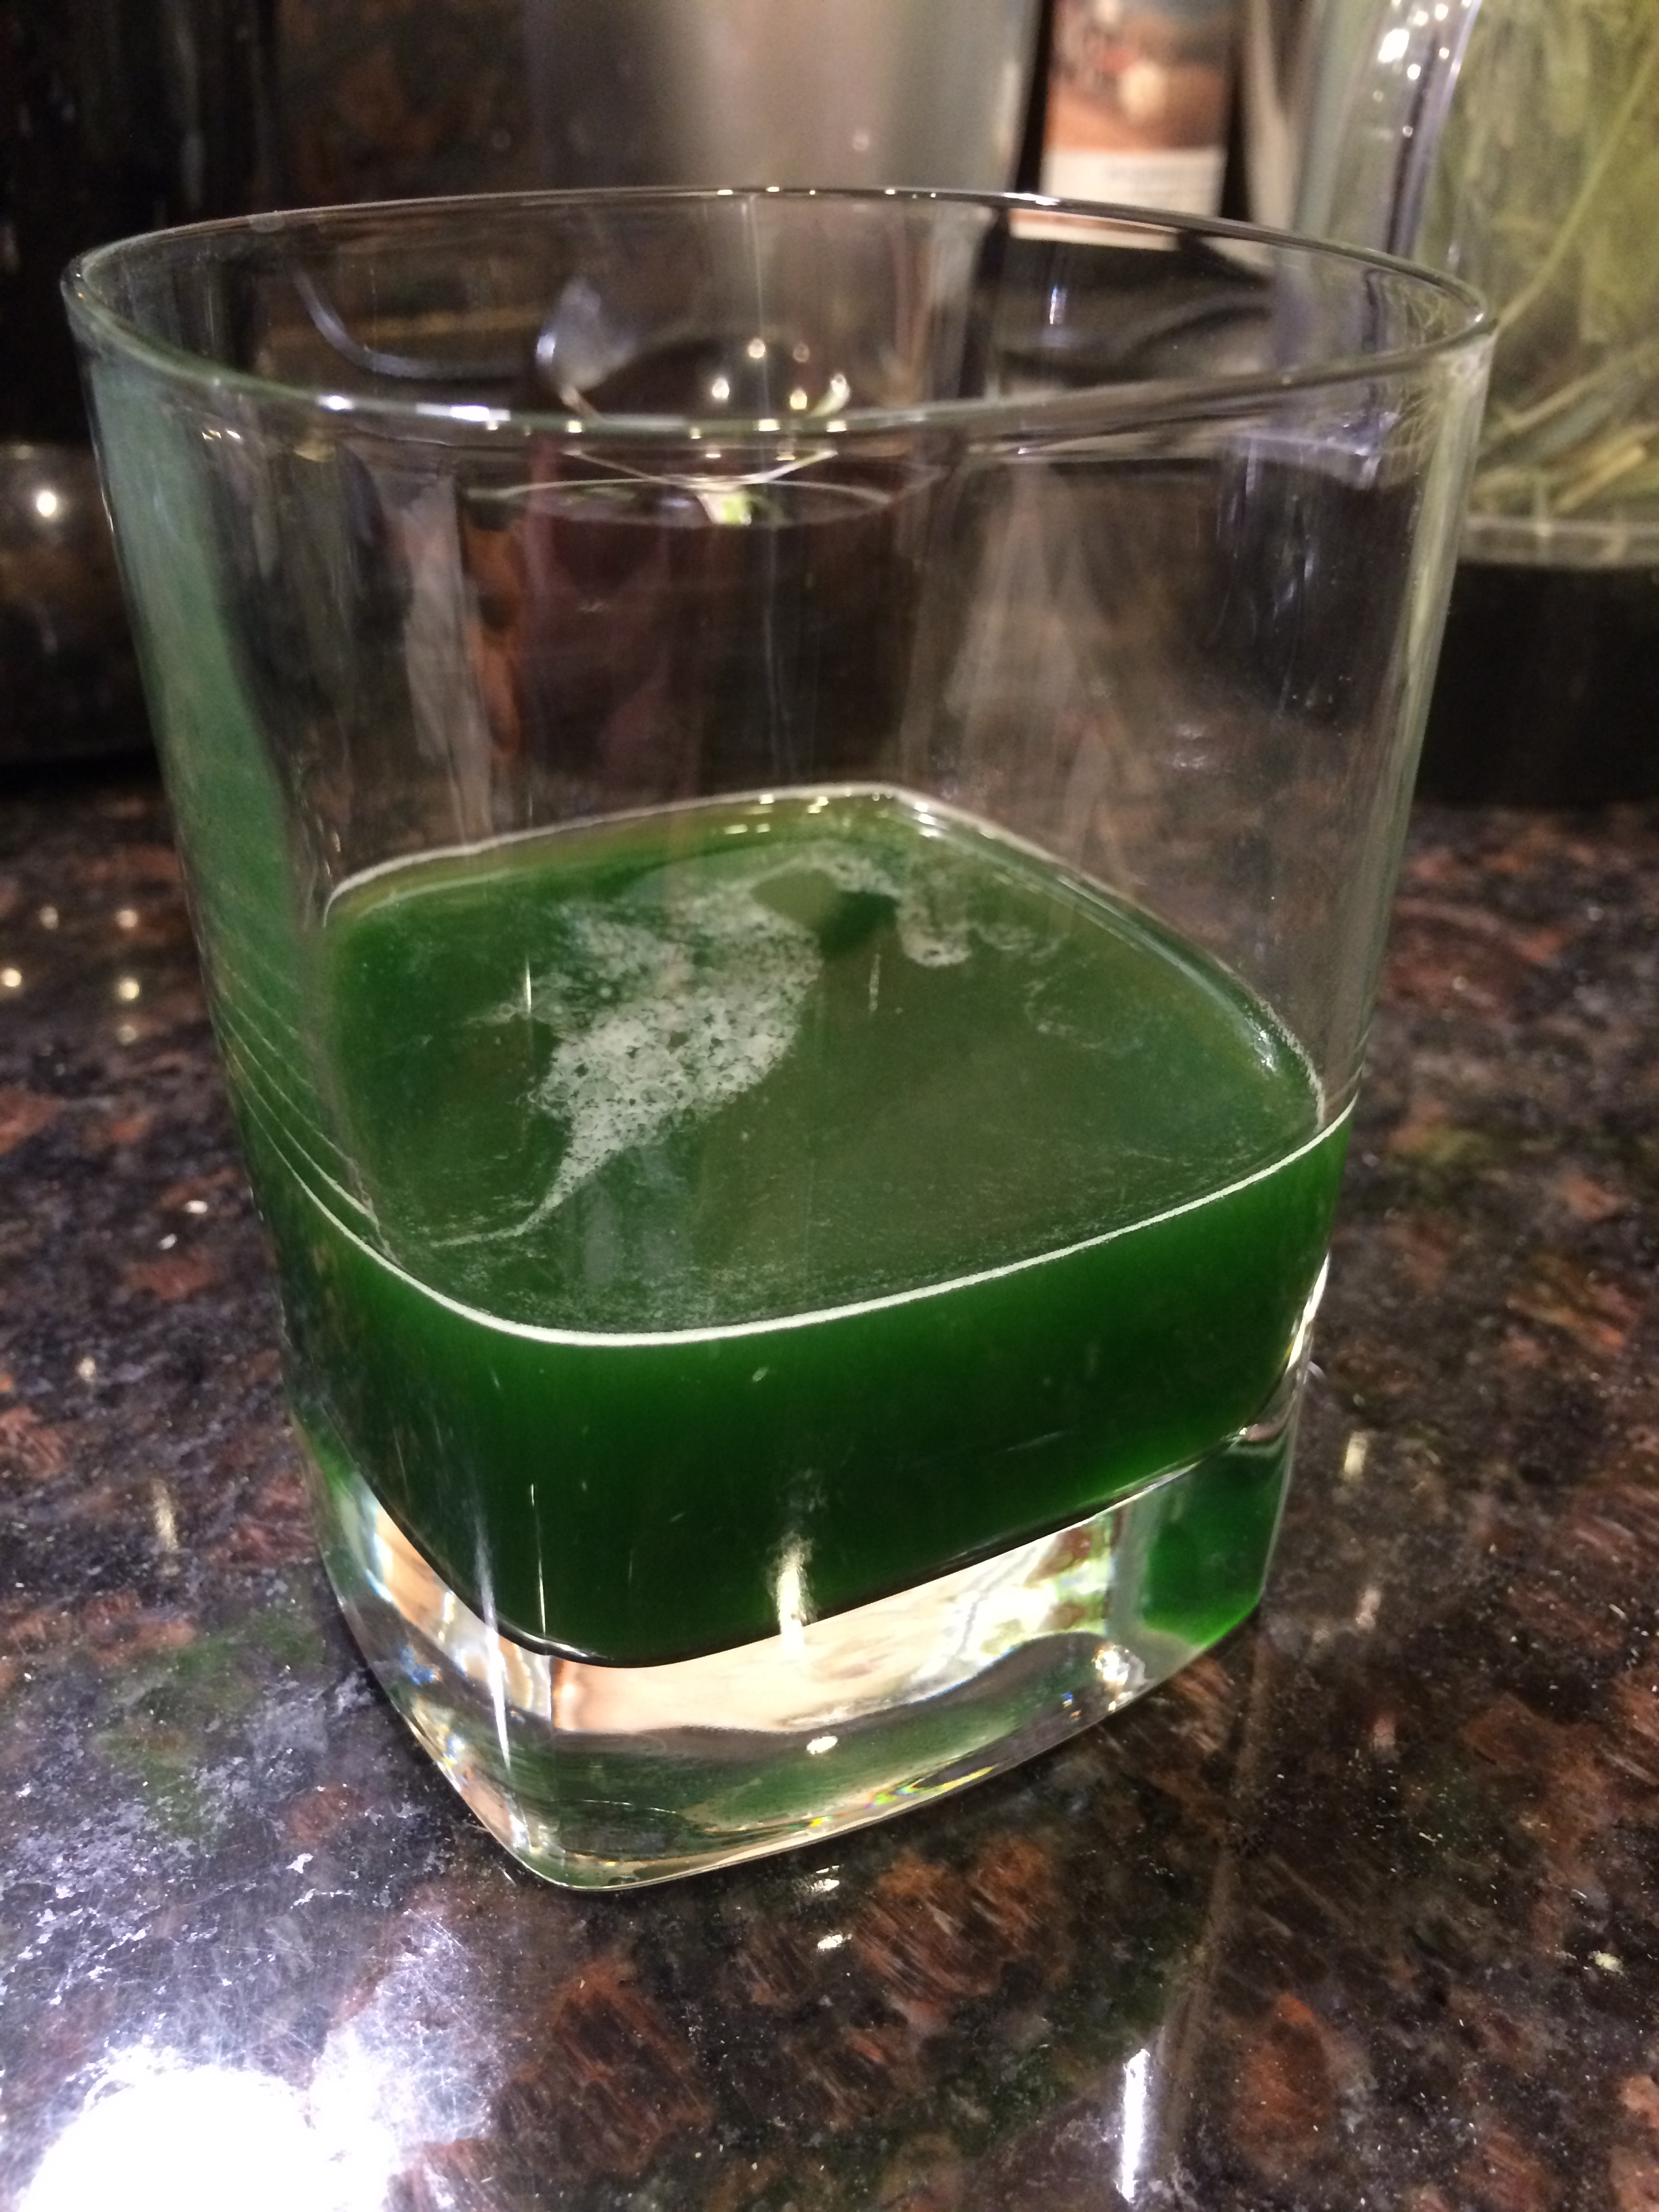
For human use, put it through a juicer and drink. I didn’t want to do that, as my juicer is heavy and a pain to clean, so I just cut a portion (about 1″ x 1″ square) and snipped it into small pieces. Into my Magic Bullet blender with the flat blade and some water, and blend, blend, blend! As soon as you think you’re done, blend for another few seconds. When you have green water and green mash, strain into a glass and press the pulp to get out all of the liquid.

Now, I’m going to be honest with you….it tastes like salad, but in a really weird way.

Happy wheatgrassing!

photo-nov-09-5-18-51-pm

More Window Sill Lovelies

6 Apr

I think we’re past the point of freezing, but who knows. We had a frost in May last year. I’m going to mix my new compost into the tanks this weekend and do some seeding. I’ll start with radishes, cucumbers, and carrots. I don’t think I’m going to go for tomatoes this year, as they require a lot more water than I think I can handle.

But good news! ShmErin will be joining us on the blog! She and her fiance moved in to an adorable 90+ year old house and they are working on their yard. She will be chronicling here.

Until then, here is my window sill garden! Basil and parsley are the same from TWO MONTHS AGO. They haven’t gotten much larger, but they’re still happy. In the middle is the celery. I soaked the root end of a left over bunch of celery and it started to grow new leaves in a few days, then eventually some little roots. Yesterday I potted it. We’ll see how it does.

Window sill garden

Window sill garden

Here is the new celery…

Photo Apr 05, 11 39 05 AM Photo Apr 05, 11 36 49 AM

Sprout Talk – Chia Edition

27 Feb

More snow on the ground this morning. I’ve been coaxing seeds to open up and spread their green-ness in order to make me happy and increase the oxygen in my place. This post has been sitting for about 10 days while I watched everything grow. Some great success, some mild success.

Three weeks ago I planted a pot of chia seeds because that’s all I had here in my kitchen. I normally just toss them into smoothies and such, sometimes make a pudding out of them, etc. A sprinkling of seed, some water, and in a few days, TINY GREEN CHIA SPROUTS! Too much soil for eating, though. Chia sprouts When seeds germinate by having a soak in water, they release sugars and proteins to help nourish the wee baby plant in its first few days, changing the flavor and making the seed and new sprout itself very healthy. (By the way, this is also the first step in making beer. Germinated grains are dried, milled, and added to water. The newly freed sugars feed the yeast that’s then added to ferment. This was my old life. Message me if you want to talk alcohol production!) Because they grow in just a few days and don’t require planting OR light, they’re great for winter snacking. I don’t know why I didn’t think to do it earlier.

Looking online I found several sprouting trays for purchase and decided on a cute $18 one from Amazon that is 6″ in diameter. Hm…. I looked into making my own and found directions for trays and jars. Both would take just a few minutes to assemble. I had everything I needed for three small stacking trays using cleaned take out containers, so I went that way.

I drilled lots of drainage holes in the two shorter containers and one of the larger ones and carefully cleaned off all of the plastic “shards” from the drilling. The undrilled containers act as drip trays. Then I took one of the lids and cut out most of the inside so I had only the rim left over. I attached the lid to an large undrilled container, and the large drilled container fit right in. Then the smaller drilled container inside that, then a full lid, so I had two “levels” there. The second small drilled container fit into the last large undrilled container, then a lid.

3 large, 2 small, 3 lids

3 large, 2 small, 3 lids

Lots of holes for drainage

Lots of holes for drainage

3 large, 2 small, 3 lids

3 large, 2 small, 3 lids


I folded some paper towels and cut them into circles to fit inside the containers over the drainage holes. Two dampened circles per tray, unless you’re using really thick paper. Seeds need to soak for a few hours (or overnight) before hanging out to sprout. Rinse them, then add to them to the sprouter. Chia seeds, you may know, get somewhat gelatinous. After they soaked for a bit and were good and gooey, I spooned a decent amount into each of the three trays, added a bit of water to the top and gently pressed on the lid. (I wound up not using them to allow for better air flow, just let them sit on top w/o snapping it on.) The excess water dripped down to the bottom trays, so there was no worry about over watering.

Soaked chia seeds

Soaked chia seeds

With paper towel filters

With paper towel filters

Small inside large, inside large with cut out lid.

Small inside large, inside large with cut out lid.


Well, it worked, and it didn’t. They sprouted, but before they did that, they stunk. I mean, rotting fish stunk. There was plenty of airflow, and I even removed the tops altogether. I’m happy to say the smell went away after they were fully sprouted. There seems to be a sweet spot in the growth where the sprouts were tastiest. Once they had a set of big green leaves (and by big I mean about 1/4″ each) they got bitter. What was pretty cool though was that the roots bonded with the paper towel, making something of a chia mat.

Photo Feb 19, 11 53 40 PM

Stinky, maggot looking sprouts.

Photo Feb 26, 3 56 33 PM

Roots embedded in paper towel

Photo Feb 26, 3 57 24 PM

Roots in paper towel


Photo Feb 26, 3 56 06 PM

These guys wound up getting really big! 2/26

Photo Feb 26, 3 55 50 PM

Final day, 2/26


This was the first part of my sprouting experiment. I also used quart sized canning jars to sprout mung beans, adzuki beans, and buckwheat groats. More of that in the next post.