
Last Friday afternoon was pretty busy. Had to deal with some guests and some stench.
So, these guys showed up at the same time and pretty much set me off for the day.
-
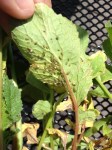
- APHIDS? ON MY RADISHES?
-

- Who is this? What does he want with my barrel table? Check out his chewing…
-

- This fuzzy spider…who is he?
What kind of bee is that? Yellowjacket? Or just some scary jerk? I can hear the chewing into the white oak whisky barrel table. Not pleased about that.
The spider was furry…and had orange and blue spots? I have named him Oliver. He may not be with us any longer, as he walked through the white powder. More on that later.
Those aphids were all over the radishes. I did not see them in the morning when I had picked a few, but by the afternoon of this  photo…ALL of the radish leaves were covered in them. Not the beans or cucumbers in the same bin, though. Interesting. Must be tastier. Anywhooo…I pulled up all of the radishes at that point. They were ready to be picked, and I had been eating them for a few weeks. Separated the radish from the leaves and tossed the leaves into the horrible smelling watery compost. Would really be disgustingly impossible for anything to survive in there, so as an immediate pesticide solution, I think I did a good job. Then I pickled the radishes.
Farmer Russell recommended I use diatomaceous earth for the aphids, which would essentially dry them out by slicing up their bodies. It’s crushed silica. ShMerin had used it in the past for uninvited guests in her home and seconded the recommendation. No additional pesticides added. She suggested I wear gloves and a dust mask (already had a bunch at home) and use a soft brush to paint the powder on the underside of the leaves. I think I looked pretty snazzy.
-

- Best. Selfie. Ever.
-
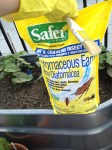
- Diatomaceous earth
-

- Post-dusting.
-
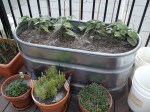
- Also post-dusting.
NOW, LET’S UNSTINK!
I’d finally given up on the anaerobic composting in the bucket. Why? Smelled like a broken sewage treatment plant, that’s why. Had to convert to “normal” traditional aerobic composting.
There are tons of instructionals here on the interwebs. Basically, I picked up an 18 gallon Sterilite bin from Target (on sale last week, too) for about $6. Drilled holes all over it. Top, bottom, all sides.
-

- Holes all over.
-

- GREAT SUCCESS!
Next I had to clean up the compost mixture. I needed a lot more “brown” material, stuff like, oh, hay and rabbit litter. How convenient! I just happen to have a nearly endless supply. Threw in a layer of several full litter boxes of hay and recycled paper litter before dumping in the stinky bucket of wet yuck. Most of the water drained out through the holes so I was able to collect it in one of the larger white buckets. Then I put the whole thing on bricks so it would get some air flow on the bottom, too. Tossed it around a bit, and all done. (I had an extra bucket top on the bottom of the bin to collect extra tea that might seep out so I could add it back to the plants, but after a few days it was collecting too much and was smelling on its own. I’ve removed the “bottom” top and today it’s sitting right on the bricks.)
Some compost pics from the past week. This stays covered all the time. I just toss my food scraps in there. ONLY plant material, no fats or oils at all.
-

- Layer of paper litter and hay as “brown” material to offset the rest of the wet stuff.
-

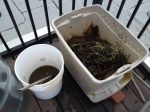
- Collected water that came from the other bucket that was dumped onto the hay. Then I tossed it around.
-
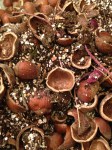
- Later contribution of hazelnut shells, coffe grinds, radish ends, washed and crushed eggshells.
-

- More dry material added.
-
- Another addition of hay and litter. More of the stinky water added back to wet it down.
Verdict? Stink is greatly reduced, and as soon as all of the old water is absorbed back into the mix I imagine it will be even better. I already see it starting to break down after about a week in there.
Then I went downstairs and took a shower. I smelled like…well, I needed to take a shower.

Leave a comment